These days, almost every website you’ll run into will have a social media presence. That goes for everything, from small blogs to massive online stores. Working on your social media will take up some of your time, and there’s a reason why everyone else seems to invest so much of theirs into it.
A social media presence is the perfect complement to most websites. It enables you to share your content on different platforms, lead more traffic back to your blog, and even engage with your users outside the comments section. It’s a lot of extra work, but the rewards are often well worth it.
In this article, I’ll walk you through why social media is so important for any blog. Then I’ll teach you how to set up a social media presence for it in three short steps, including automating a few processes. Let’s get to it!
Why Your Blog Needs a Social Media Presence
Running a blog without a social media presence doesn’t make much sense nowadays. Most – if not all – of your followers will have accounts on multiple social media platforms. Sometimes, they’ll even use those accounts to share articles they like when they’re not busy uploading photos of their latest meal. Your goal should be to make it among those articles.
Aside from giving you additional sources of traffic, social media is also a great way to keep the conversation going with your followers. A lot of people won’t bother leaving comments on your blog. However, they may be more open to interactions through social media. The more you interact with them, the more likely they are to find your content engaging, because they’ll feel as if you’re talking to them.
Overall, the only downside to using social media to promote your blog is it requires additional work on your end. However, the rewards tend to be worth it, and there are ways to run your accounts more efficiently.
How to Set Up a Social Media Presence For Your Blog (In 3 Steps)
The key to a successful social media strategy is to know how to split your time and which platforms to focus your efforts on. Let’s talk about how to do that.
Step #1: Determine Which Social Media Platforms to Use and Set Up Accounts
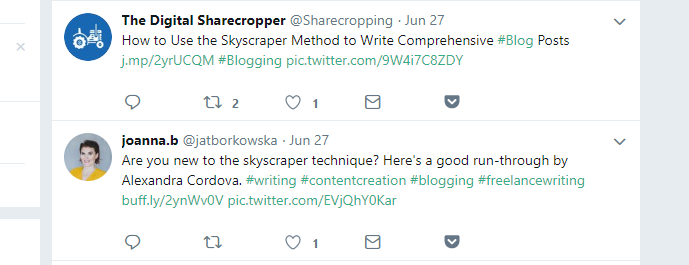
There are hundreds of social media platforms to choose from nowadays. In my experience, you’re better off focusing on one or two of them at the most. My personal favorites when it comes to promoting my projects are Twitter and Facebook because it’s common for people to use them to share blog posts:

I could also share this blog post via Instagram, to give you another example, but chances are it wouldn’t get much engagement. After all, that social network is all about visual content, and I’d need a hell of a featured image to catch people’s attention and get them to click on a link.
At this stage, you need to ask yourself, what social media platforms do you see your content being more successful in? For example, a food blog might do much better on Instagram if you have a lot of great photographs. Once you know what platform you want to use, go ahead and create an account for your website on it. You can also use your own personal account to promote your content, but honestly, it can turn off some of your friends, so I like to keep things separate.
Step #2: Add Social Media Links and Sharing Buttons to Your Blog
Once your social media accounts are set up, your next move should be to link to them through your website. The way most people do this is by placing simple buttons somewhere visitors won’t be able to miss them:
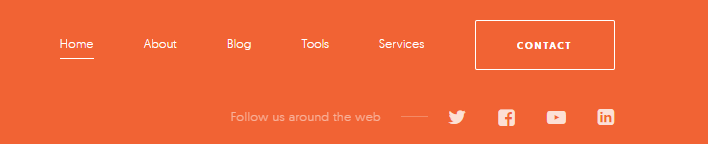

Everyone knows what those icons mean, so you don’t even need to add text to them. However, a simple call to action such as “Follow us on social media!” is never out of place. Aside from that, one feature I always like to include on my websites are social media sharing buttons:


What these buttons do is enable people to share your posts through their accounts with a single click. The easier you make it for people to share your content, the more likely they are to do it. Plus, sharing buttons are incredibly easy to add if you’re using WordPress.
Step #3: Set Up Basic Social Media Automation
Your social media presence is already set up, so all that’s left is to look for ways to help you manage things more efficiently. That’s where automation comes in.
With WordPress, there are several processes you can automate involving social media. For example, you can make it so each time you publish a new post, it’ll automatically share on social media, which is one of my favorites.
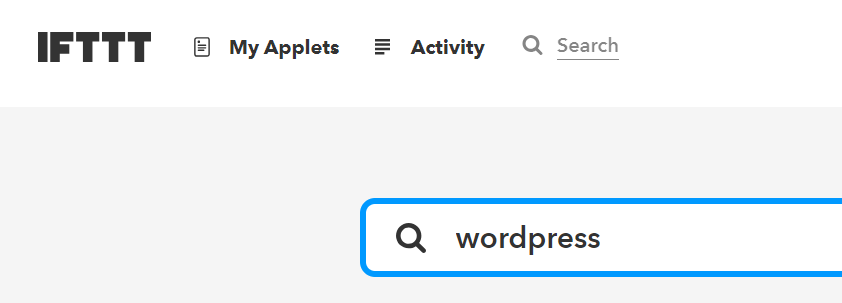
There are a lot of tools you can use to do this. For example, you have IFTTT, which enables you to connect WordPress with pretty much any social media platform you can imagine:

If you’re more of a plugin person, you also have a lot of options. One of my favorites is called Revive Old Posts:
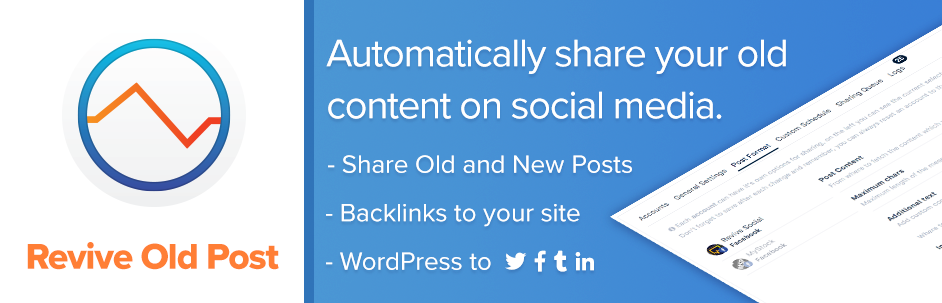

With this plugin, you can both auto-share posts to social media and configure it so it revives old publications from time to time, to drum up traffic during lulls, for example. The only things you can’t automate are social media interactions, which wouldn’t make sense anyways. If someone is taking the time to engage with you via social media, you should always get back to them in a timely manner!
Conclusion
Regardless of what your niche is, your blog can probably benefit from a social media presence. The good news is you don’t need to set up profiles on all the social media platforms available online, which would probably take weeks. Just one or two profiles will do the trick in most cases, and the platforms you use will vary depending on your audience.
We can sum up the process of how to set up a social media presence for your blog in three simple steps:
- Determine which social media platforms to target and set up accounts for your blog.
- Add social media links and sharing buttons to your blog.
- Set up basic social media automation to save time.
Learning how to set up a social media presence is just one of the steps you need to tackle to get a successful blog off the ground. We cover the rest of them in our Start a Blog guide, which you should check out if you need a little help getting started.