

Search engines are, in essence, an index of almost all the websites on the web and the pages that make them up. However, that index doesn’t come out of nowhere and, with thousand of new pages coming to life every day, it never ceases to expand.
As you might imagine, there aren’t a bunch of people in a dark room indexing every new site by hand. Indexing happens almost automatically. If you understand how it works, you can make sure that Google doesn’t miss any of your key content.
In this article, we’ll break down how search engines index blogs. Then we’ll go over two ways you can make sure they don’t overlook anything on your site. Let’s get to it!
What Is Indexing?
The web is a lot more massive than you might think. There are billions of sites online and search engines are the primary way through which we find them in our day to day lives.
Indexing all that data manually is outright impossible. What search engines do is rely on bots they call ‘crawlers’. These bots navigate the web, jumping from link to link so they can map as much of the web as possible.
That process takes place automatically. For new sites and blogs, it shouldn’t take long until bots from multiple search engines crawl your website. Once that happens, it can start to show up in results pages.
The problem is, crawlers aren’t infallible. For them to work as they should, your website needs to follow some very basic guidelines. For starters, you need to include plenty of internal links and key pages should show up on your main navigation menu.
Secondly, you shouldn’t use different versions of your website for desktop and mobile devices since that can confuse search engines. These days, creating a fully mobile-friendly blog is pretty darn simple. If you follow those basic guidelines, search engines shouldn’t have any problems indexing your blog.
How to Control the Way Search Engines Crawl Your Site (2 Steps)
Although crawlers act independently, you can tell them what parts of your website to focus on. That becomes key the more complex your blog grows.
1. Set Up a robots.txt File
On top of having a very cool name, robots.txt files fulfill a critical function. They tell crawlers what parts of your website they shouldn’t bother with, so search engines know not to index them.
Logically, you’d want search engines to crawl over all of your pages. However, in practice, there are pages that can use up your crawl ‘budget’ and that don’t need indexing. Some examples are:
- ‘Thank you’ pages for when you make sales or someone signs up to your mailing list
- Your admin login page
- Embedded files
- Your blog category and tag pages
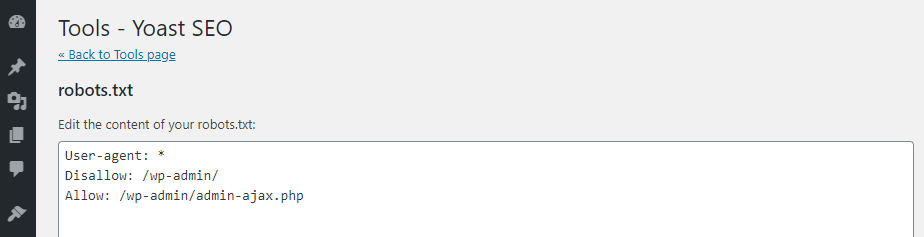
Basically, you don’t want visitors to get access to your blog’s ‘backstage’ pages via search engines. A robots.txt file takes care of this using a simple format which looks like this:
User-agent: *
Disallow: /wp-admin/
Disallow: /wp-login/
That’s a very simple example of a robots.txt file that targets every crawler that visits your website and tells them to avoid your admin and login pages. You can set up robots.txt file using a text editor and all you have to do is place it on your website’s root folder.
If you’re using WordPress for your blog, you can use the Yoast SEO plugin to help you take care of robots.txt files (as well as the next step we’re going to cover).
To generate a robots.txt file using Yoast SEO, go to SEO > Tools and click on the File editor option:

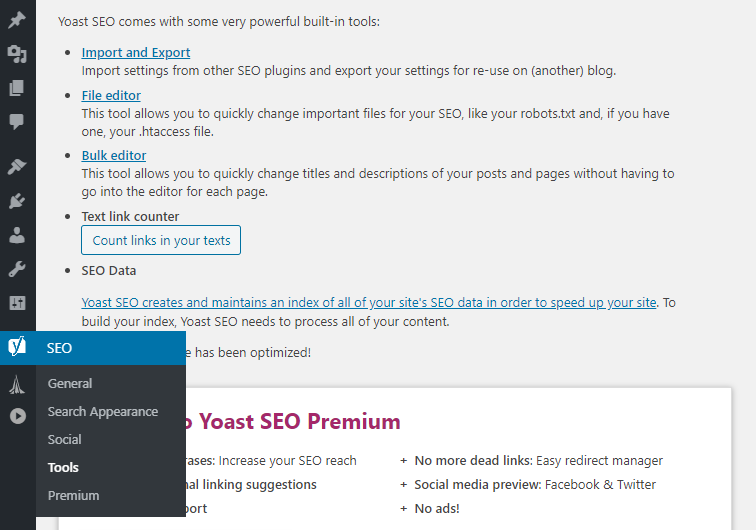
On the next page, click on the Create robots.txt file button and the plugin will set it up for you. You’ll also be able to edit the file directly from this screen:
IMAGE

Once you’re happy with the changes you’ve made, click on Save changes to robots.txt and you’re good to go. Now, it’s just a matter of time until the next bot crawls through your website and catches those changes.
2. Submit a Sitemap to Google Search Console
As the name implies, a sitemap is a map of your entire website. That means it includes all the pages you want search engines to pay attention to. In practice, it’s a simple list of URLS that you save in .xml format.
If you’re using Yoast SEO, the plugin automatically generates a sitemap of your blog when you active it. To access that sitemap, go to the SEO > General > Features tab and look for the XML sitemaps option:

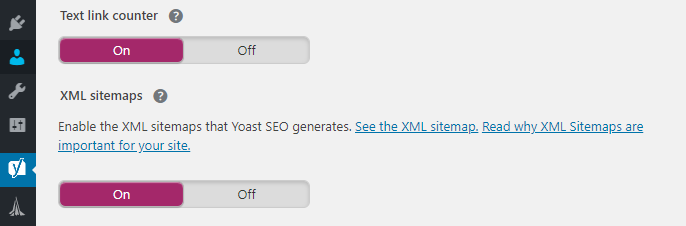
The setting should be turned on by default. To see your sitemap, click on the See the XML sitemap link right on top of the setting’s toggle. Your sitemap should look something like this, only with a much longer list of pages:

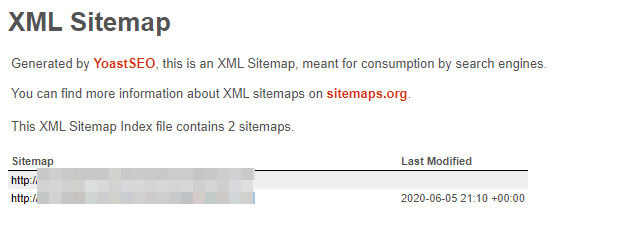
What we really care about is your sitemap’s URL, which should look something like yourblog.com/sitemap_index.xml. You’ll need that URL in a minute, so copy it down somewhere.
In theory, search engines should be able to access your sitemap through crawlers. However, it’s commonly considered a best practice to submit your sitemap to search engines directly. That way, you can make sure they don’t miss any key pages.
With Google, that process is rather simple. You need to sign up for a Search Console account with your blog. Search Console offers a broad range of tools to help you manage your website but what we care about now is the Sitemaps tab. If you click on it, you’ll see the option to submit an updated sitemap for your blog:

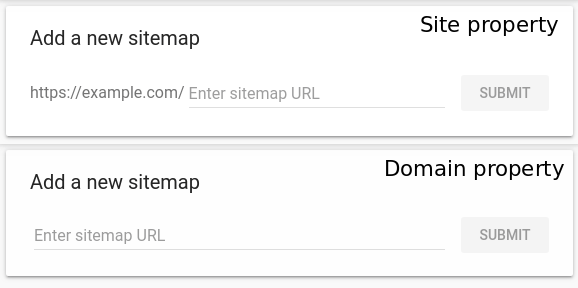
All you have to do is enter the link you copied a minute ago and save the changes. Now, Google will have an up-to-date map of your entire website, meaning it won’t skip over any of your best content.
Conclusion
Without an index, there can be no search rankings. Google and other search engines are only as relevant as the indexes they maintain, and they tend to be very thorough. In any case, it doesn’t hurt to make sure search engines index your blog correctly.
There are two basic ways you can ensure that happens and those are:
- Setting up a robots.txt filE
- Submitting a sitemap to Google Search Console
Do you have any questions about how search indexing works? Let’s talk about them in the comments section below!
Image credit: Pixabay.