

Not to worry! WordPress features an easy-to-use editor. The trick is to be familiar with the interface before diving in headfirst. By understanding blog formatting standards and their options in WordPress, you’ll be a pro in no time.
In this article, I’ll show you how to format your first WordPress blog post. By the end, you should feel confident to offer formatting services to your next paying client. Let’s get started!
How to Create a Blog Post in WordPress
After landing your first freelance writing gig, your client likely expects you to create the complete WordPress post from start to finish. If you’ve never practiced this on a blog of your own, it’s a good idea to know how to add a new post in the first place!
Creating a post in WordPress is fairly simple, but seeing the full workflow makes it easier:
- Login to the appropriate WordPress site. Your client should provide this access information.
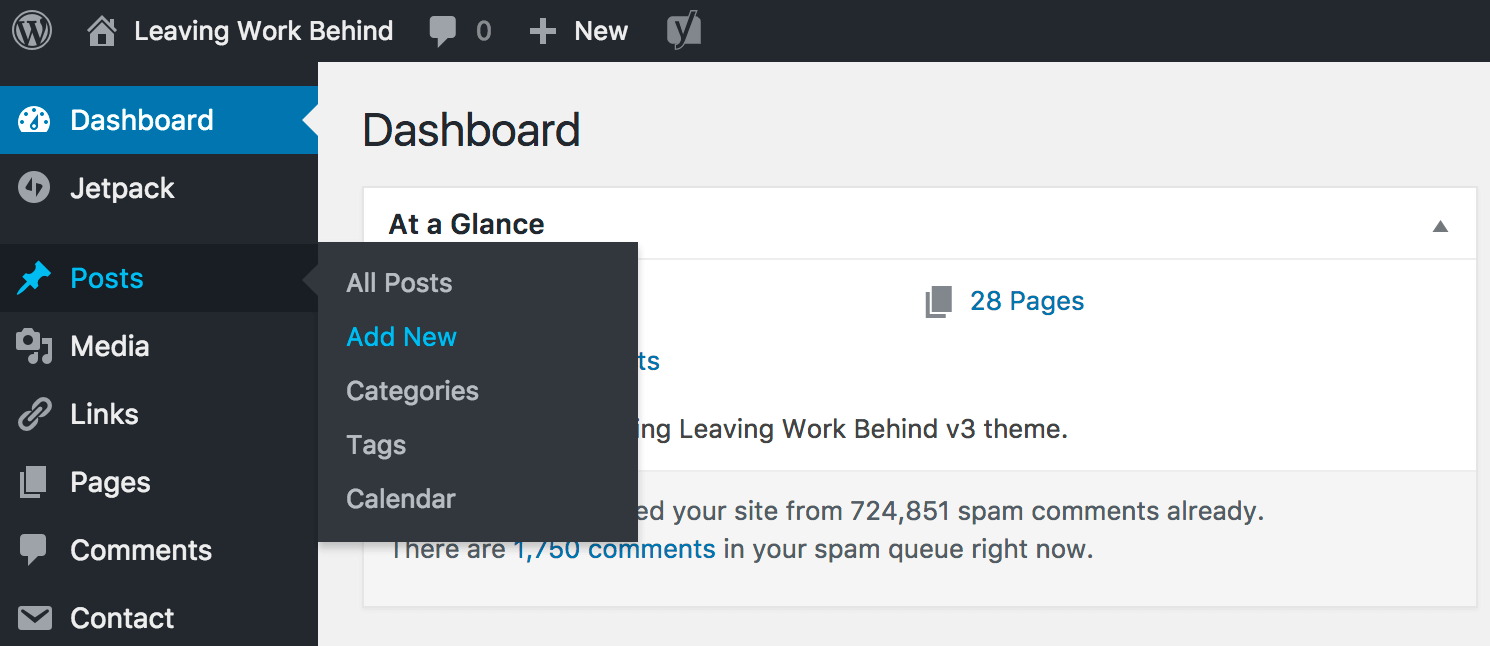
- Find the sidebar on the left, and find the Posts link.
- Click on the Posts > Add New link.
- Here, you can see a place to enter the post title, and a content area.
- Paste in your content and get ready to format!

A word of caution: Be sure to click Save as Draft and not Publish, or you’ll send the post live by mistake before it’s ready. If you’re still in the process of writing the blog post, be sure to follow basic stylistic guidelines to ensure you write quality work.
Once your post is in WordPress, it’s time to start formatting.
4 Tools for Formatting WordPress Blog Posts
Well formatted WordPress posts makes your post easier to read for visitors. It also makes the post more search engine friendly, which can help with rankings.
None of the following tips are difficult, but are important to be aware of and use within your posts. The few minutes it takes to format a blog post is well worth the investment, so let’s get to it.
1. Clear Formatting
Websites are built with HTML and CSS, giving the webpage its structure and design. Unfortunately, many text editors (such as Microsoft Word) add in extra HTML and CSS styles along with the content. When you paste your post directly into WordPress, you often end up with incompatible formats conflicting on your site. This is the cause of many mysterious design issues within blog posts!
Clearing imported formatting removes accidental styles carried over from the original document. This ensures you start fresh, and can properly format the rest of the post without anything confusing hiding behind the scenes.
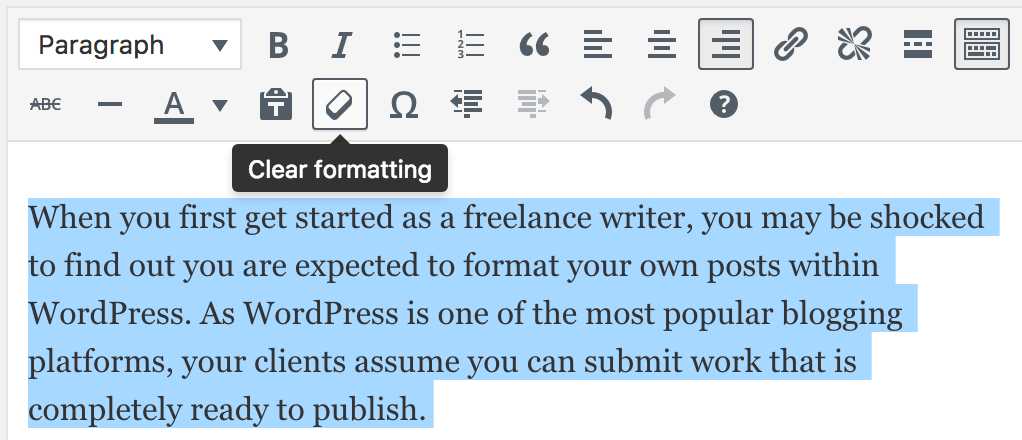
To clear formatting in WordPress, highlight your entire blog post in the content area and click the Clear Formatting icon in the editor menu. If you don’t see the button, you may need to click the Toolbar Toggle button first.

Once your content is clean, you can move forward without any conflicting styles getting in the way.
2. Heading Tags
Heading tags are HTML elements indicating the beginning of a new section in the text. By default, a Heading 1 tag is the most important, all the way down to the Heading 6 tag. Most bloggers stick to the top three heading tags for simplicity. Each lower level heading should count as a subsection for the heading above it, grouping similar content together.
Headings are vital to use in your blog posts for two reasons. They split up long-form content and enable users to quickly scan for what they need. Headings also help search engines identify crucial points on the page. The words you use in a heading tag are considered more important than paragraphs by search engines, so be sure to choose useful and relevant section headings.
To set a heading tag, select your desired headline text in the editor and use the provided dropdown to choose a level.
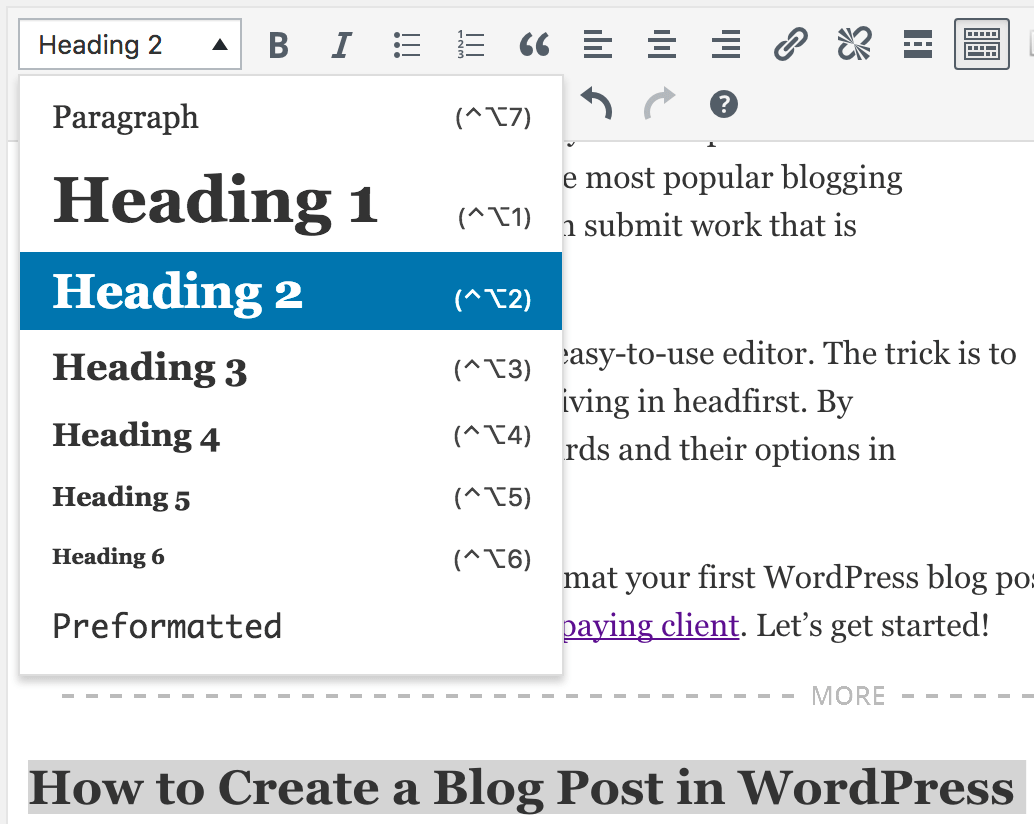

Once you make your selection in the dropdown, the text turns into a heading tag!
3. Image Descriptions, Captions, and Sizes
Images are a huge part of blogging, as they add visual interest and engage readers. However, improperly formatted images can slow down a blog post or make the post confusing should an image not load for some reason.
To avoid these issues, it’s important to write image descriptions, include captions, and set sizes. This improves usability for people using screen readers and on slow connections, and even helps search engines index your images better.
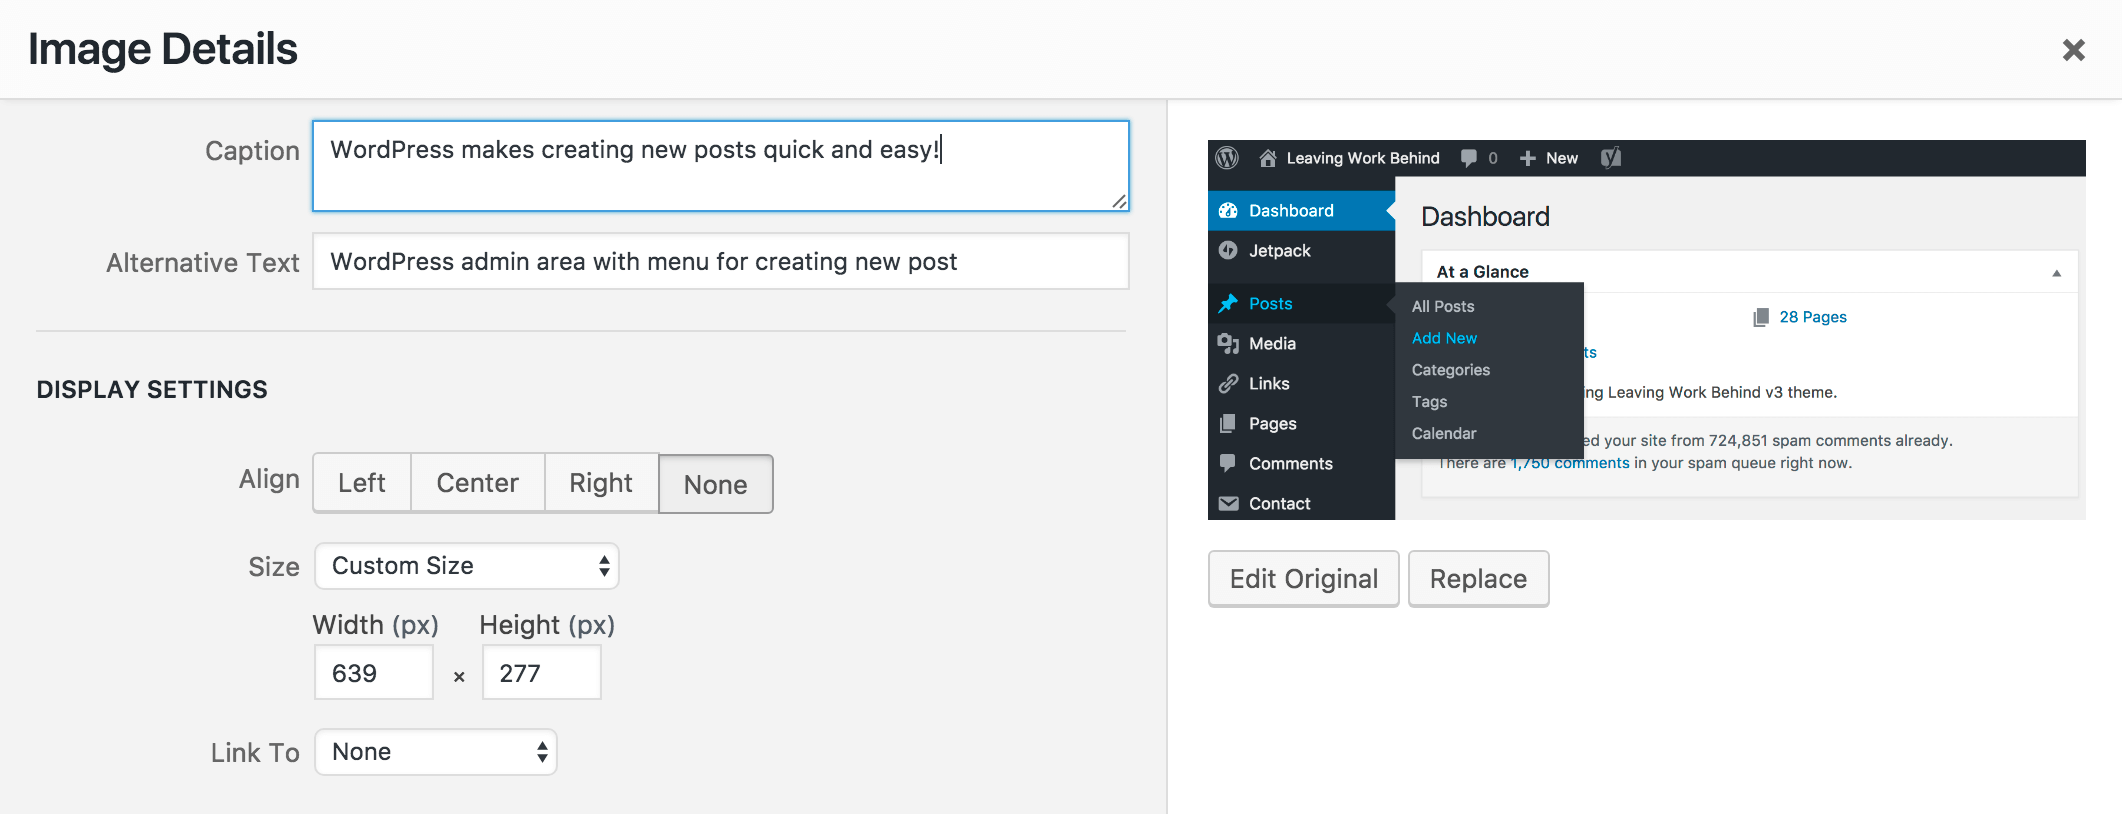
Once you’ve inserted a new image, hover over it and click on the Edit pencil icon. This brings up a modal box with options to insert helpful information about the image. For best results, describe the image in the Alternate Tag box and write a helpful caption in the Caption area. To reduce the image size, use the Display Settings > Size option in the same modal box to set the appropriate image size for your blog’s design.

An image should never need to be bigger than 2,000 pixels! Using oversized images slows down your page, and doesn’t improve the visual quality. It’s best practice to make it as small as you can without sacrificing the purpose of the image.
4. Lists and Block Quotes
For our last formatting technique, we have lists and block quotes. These are two textual indicators to set aside special content within the blog post. Lists gather sets of related content in short bullet points, making them quick and easy to read. Block quotes highlight standout content within the post.
Using lists and block quotes makes it easy for readers to find important parts of your article. Search engines also tend to favor these in special results, such as featured snippets.
Turning content into a list or block quotes is another simple task that can make a huge difference! Simply highlight the text you’d like to turn into a list or block quote, and choose the appropriate icon in the editor.


Including lists and block quotes makes the post much easier on the eyes. The easier a post is to read, the happier the visitor is to read it.
Conclusion
Becoming a professional blogger has a small learning curve where you are expected to learn a few new tools. It may feel scary at first, but formatting a blog post in WordPress is relatively easy! Your freelance clients will appreciate your newfound expertise.
These essential tools will help you format professional WordPress blog posts for clients:
- Clear formatting, in case any code gets copied from your writing software.
- Heading tags, to create sections in your text correctly.
- Image descriptions, captions, and sizes for better usability.
- Lists and block quotes, for content that doesn’t belong in paragraphs.
What questions do you have about formatting blog posts in WordPress? Ask away in the comments section below!
Image credit: Andrew Neel.